 Save
Save Sometimes, baking feels like painting—especially on gray spring mornings when the kitchen light glows especially soft. One rainy March day, craving color and something a bit magical, I started experimenting with a simple vanilla cake and my stash of gel food colors. By the time I was swirling together pale pink, yellow, and seafoam green batters, I realized this little project was as much therapy as dessert. The floral-scented sugar in the air felt like a celebration in its own right. It’s funny how a few pastel hues can brighten up a table—let alone your mood.
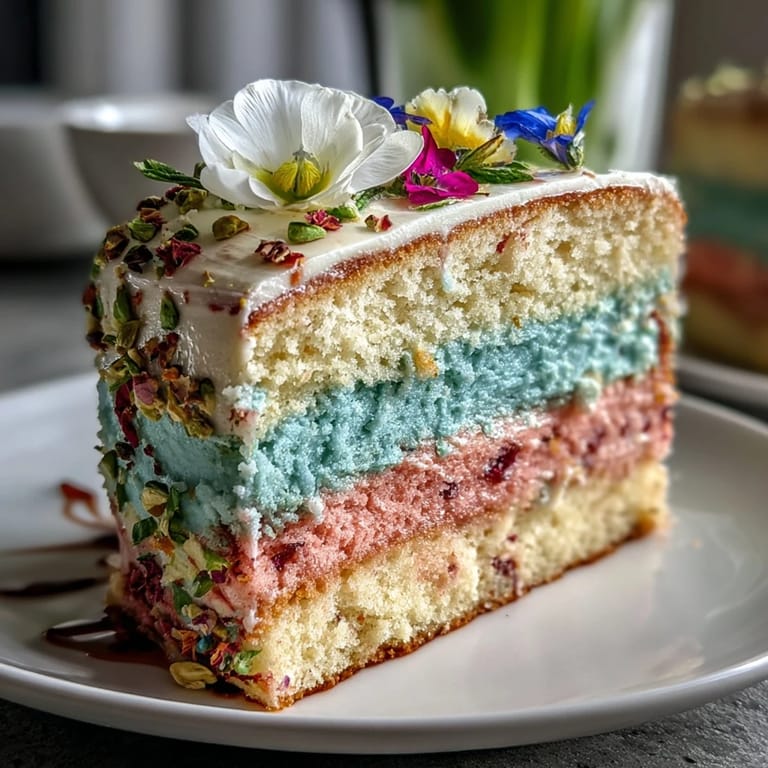
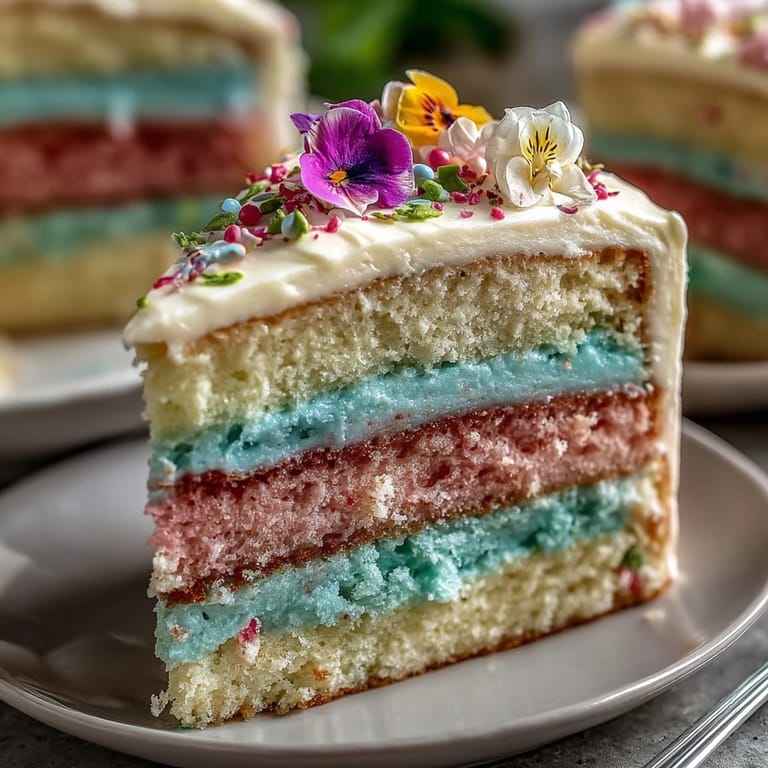
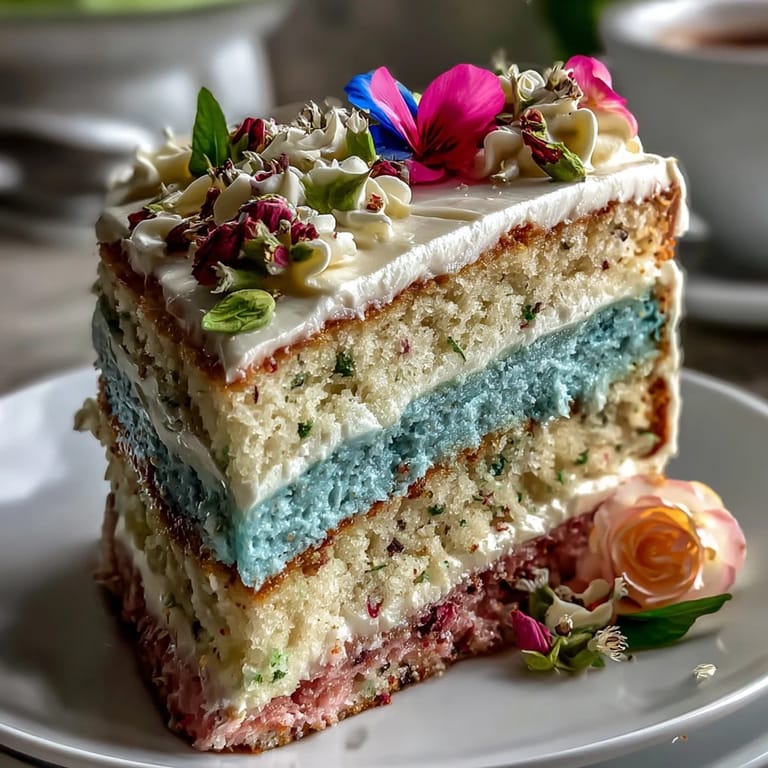
The first time I set this Ombre Spring Cake on the table, my friends gathered around like it was a bouquet you could eat. We laughed about who got which color slice and I’ll never forget their delight at discovering the layers weren’t just for looks—each bite tasted as dreamy as it appeared.
Ingredients
- All-purpose flour: Gives the cake its delicate crumb; I always aerate it before measuring for the lightest texture.
- Baking powder & baking soda: They make the cake layers rise just enough—don’t skip sifting into your dry mix for even distribution.
- Salt: Just a pinch, but don’t underestimate it—it wakes up all the flavors.
- Unsalted butter (for cake & frosting): Essential for rich flavor and that creamy mouthfeel; be sure it’s truly at room temperature for flawless creaming.
- Granulated sugar: Sweetens and helps build the cake’s tender structure.
- Eggs: Bind and lift—let them warm to room temp so the batter stays silky and never curdles.
- Pure vanilla extract: Adds comforting, aromatic warmth; invest in real extract, it’s worth it.
- Whole milk: Gives moisture and richness—stir gently at the end to keep things tender.
- Gel food coloring (pastel pink, yellow, green, or blue): For vivid pastels without thinning your batter; less is definitely more.
- Powdered sugar: Super-fine and sifted for the smoothest, fluffiest buttercream.
- Vanilla extract (for frosting): Just a splash transforms the buttercream from plain to dreamy.
- Whole milk or heavy cream (for frosting): Adjusts consistency—start with a little and add as needed for spreadability.
- Edible flowers (pansies, violas, roses, chamomile): Choose organic and edible only—these add the finishing touch, turning your cake into a centerpiece.
Tired of Takeout? 🥡
Get 10 meals you can make faster than delivery arrives. Seriously.
One email. No spam. Unsubscribe anytime.
Instructions
- Prep the cake pans:
- Grease three 8-inch pans and line them with parchment; don’t skip this or pastel layers might stick and break apart.
- Mix dry ingredients:
- Whisk flour, baking powder, baking soda, and salt, letting the dry blend turn airy—watch it puff up lightly as you stir.
- Beat butter and sugar:
- Cream these together for three minutes—stop when it looks pale and fluffy, and admire how the mixture smells faintly caramelized.
- Add eggs and vanilla:
- Crack in eggs one by one, scraping down the sides, then splash in vanilla for a sweet, familiar aroma.
- Combine with dry mix and milk:
- Alternate adding flour mix and milk; stir gently so the batter stays pillowy and never dense.
- Color and divide:
- Spoon the batter into three bowls, adding a dab of pastel gel color to each; swirl slowly to see the ombre gradient form.
- Bake:
- Pour batters into pans and bake until just golden at the edges; a toothpick should come out with only a crumb or two attached.
- Cool cake layers:
- Wait ten minutes before turning cakes out onto a wire rack—listen for the soft release as layers fall free.
- Make buttercream frosting:
- Beat butter until creamy, sift in powdered sugar while mixing on low, then add vanilla and milk until light and easy to spread.
- Color the frosting:
- Divide into bowls and tint with coordinating pastel shades—watch the pretty transformation as you stir.
- Assemble layers:
- Level cakes if needed, then layer with buttercream; use an offset spatula for dreamy, smooth coverage.
- Add crumb coat and chill:
- Smooth on a thin layer of frosting around the whole cake—chill to set so final coats look pristine.
- Finish ombre and decorate:
- Blend frosting colors up the sides for a watercolor effect; finally, crown the cake with fresh edible flowers right before serving.
 Save
Save At my sister’s spring brunch, this cake became the centerpiece and the conversation starter. Watching everyone photograph their first slice before digging in, I realized the real celebration was sharing something handmade—and watching it light up the room.
Choosing Edible Flowers with Confidence
Getting nervous about using flowers? I was, until I learned to always buy organic, labeled edible blooms from a reputable store or farmer’s market. Sometimes, I even chat with growers about what’s in season—chamomile adds such a cheerful touch, while violets taste surprisingly sweet. If you’re unsure, skip or swap—never risk non-edible or pesticide-treated blooms.
Getting That Ombre Effect Just Right
The secret to seamless ombre is to use the tiniest dab of gel color and mix gently—less stirring means soft gradients rather than strong bands. Start small, adding more color if needed, and always use super clean utensils so colors don’t blend unintentionally. I’ve even done a trial swirl in a spare bowl the first time, just to see how pastel each shade would look after baking.
Making Ahead and Serving Tricks
Ombre cakes can be made a day in advance—just leave off the flowers until you’re ready to serve, as they’re freshest that way. Chill the assembled, frosted cake to help flavors meld and layers stand tall, but let it come to room temperature before slicing for tender texture. When you present it, don’t forget the gasp-worthy reveal when you cut that first pastel wedge.
- If you’re storing leftovers, keep them covered and chilled—those colors stay bright this way.
- Use a hot, dry knife for the cleanest cake slices.
- Always check your flower sources one last time before decorating.
 Save
Save A little patience, a playful color palette, and a handful of fresh flowers—this cake might just turn any day into a spring celebration. Here’s to baking more beauty into the everyday.
Recipe FAQs
- → How do I achieve a smooth ombre effect?
Divide batter and frosting, tint each portion with gel food coloring in gradual shades, and layer carefully for seamless blending.
- → Which edible flowers are best for topping?
Pansies, violas, roses, and chamomile work well. Ensure flowers are organic and labeled safe for consumption.
- → Can I make this dessert in advance?
You can bake the layers and prepare frosting a day ahead. Assemble and add flowers just before serving for freshness.
- → Are there vegan alternatives for this cake?
Replace dairy and eggs with plant-based butter, milk, and egg substitute. Results may vary slightly in texture.
- → How do I prevent cake layers from drying?
Do not overbake. Cool completely before frosting and store assembled in an airtight container until ready to serve.